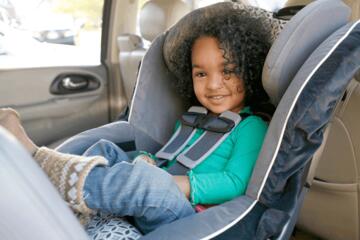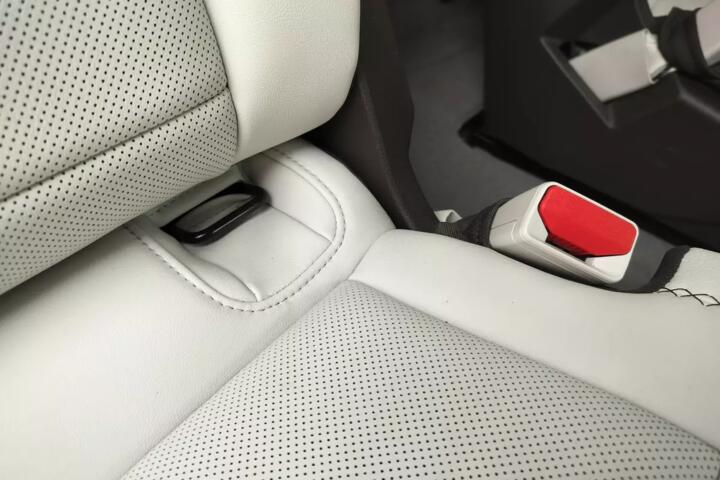
Why LATCH Anchors Matter
LATCH anchors are the lower anchors and tethers used to attach many child seats without relying on the vehicle seat belt for the main connection. In the U.S., the NHTSA has long emphasized correct installation because a loose install can reduce protection in a crash. A typical target is under 1 inch (about 2.5 cm) of movement at the belt path when you test the seat. Vehicle type changes the outcome because anchor spacing, seat cushion shape, and seatbelt geometry vary between sedans, SUVs, and pickups.
Skip the “it feels tight” test. They add one more thing to manage. Use the manufacturer’s belt-path marks and the LATCH label on the seat or vehicle manual. LATCH systems also have weight limits that vary by seat model, which matters when you move from an infant seat to a convertible seat.
Real-world installation time matters too. Many caregivers end up redoing the install after a seat is moved, because the routing changes when the car seat base shifts on a different cushion angle. In fleet settings, we often see the same pattern: the first install looks fine, then the seat loosens after a few weeks of daily use and seatback adjustments.
Installation Pain Points
People get LATCH wrong in predictable ways. They clip the lower connectors to the wrong anchors, twist the belt path, or let the seat base sit on a raised plastic ridge that prevents a flat fit. Some vehicles have rear-seat anchor locations that are hard to reach, which leads to partial engagement—again, not obvious until you do a proper movement test.
Loose installs cost more than time. They can increase head excursion in a crash, and child-seat manufacturers design their systems around tight installation. A seat that moves more than 1 inch at the belt path can fail the intended geometry for the harness and tether.
Financial consequences show up fast. If you buy a vehicle that makes installs difficult, you may pay for repeated professional checks, replacement parts, or even a different seat model that fits the vehicle better. In some cases, caregivers end up using seat belts instead of LATCH because the lower anchors don’t line up with the seat’s belt path, and that swap can change how tight the install becomes.
Real-world situations are common: a family switches from a compact sedan to a midsize SUV for road trips, then discovers the child seat base sits at a different angle. The tether anchor might be in a different location, and the tether strap length can change the final tightness. That’s why vehicle type matters more than many buyers realize.
Install LATCH Correctly
Start with the right anchors
Use the vehicle’s LATCH anchor positions marked on the seat or in the owner’s manual. This works because the lower connectors are designed to attach to specific anchor points that match the child seat’s belt path. In practice, you should be able to click both connectors in without forcing them, then verify the connectors are not twisted.
Check the label on the child seat for its LATCH weight limits. They vary by model, so a seat that supports LATCH up to a certain child weight may require seat belt installation after that point. If you’re comparing vehicles, bring the child seat manual and confirm the anchor reach before buying.
Use the tether when required
Attach the top tether when the seat design calls for it, even if the lower anchors are tight. Tethers reduce forward head movement by controlling the seat’s rotation in a crash. In practice, you route the tether through the designated path and tighten it until the seat base is stable with less than 1 inch movement at the belt path.
Skip the “tether later” habit. It rarely works the way the docs say. Some vehicles have tether anchors behind seatbacks, and you may need to lift a cover or adjust the headrest to reach them.
Lock the belt path geometry
Keep the child seat’s belt path flat and aligned with the manufacturer’s routing diagram. This works because the seat’s internal belt path and connector angles are part of the crash geometry. In practice, you should not route the strap over the wrong plastic guide or let the base rock on the cushion.
Use a firm hand at the belt path while tightening the LATCH strap. If the seat base shifts when you release pressure, the install is not finished. A quick measurement helps: re-check movement after you tug at the seat near the belt path, not at the harness.
Confirm tightness with a test
Perform the movement test at the belt path using the method in the child seat manual. This works because manufacturers define acceptable movement based on how the seat is designed to perform. In practice, you push and pull side-to-side and front-to-back at the belt path and measure the maximum movement.
Target under 1 inch (2.5 cm). If you exceed that, re-route the strap, change the seat position, or try a different seating position in the same vehicle. A seat that is acceptable in one spot can be too loose in another because cushion shape and anchor angle differ.
Match seat type to vehicle seat
Rear-facing infant seats and convertible seats behave differently on the same vehicle. This works because rear-facing installs often require a specific recline angle, and recline affects how the base contacts the cushion. In practice, you may need to adjust the vehicle seatback angle or use the child seat’s built-in recline indicators.
For example, a compact sedan’s rear cushion can be flatter than a midsize SUV’s, which changes how the base sits. If the base tilts, the tether tension and lower connector angle can change, and the movement test can fail.
Plan for seat moves and daily use
Expect the install to change when you move the child seat between vehicles or when you fold and unfold rear seats. This works because the anchor geometry and cushion compression differ each time. In practice, keep a small checklist: confirm connector clicks, re-tighten the LATCH strap, and re-run the belt-path movement test after any major adjustment.
Skip the assumption that “it was tight yesterday.” Daily use adds variables like seatback recline changes and child seat base contact with clothing or blankets. If you use a seat protector mat, verify it does not interfere with the base contact area.
Use professional checks when fitting is awkward
When access is difficult, a certified child passenger safety technician can spot issues quickly. This works because technicians know common vehicle-specific routing problems, like tether anchor covers that don’t sit flush or lower anchors that are recessed. In practice, you bring the child seat, the vehicle, and the manual, then watch the technician verify tightness and routing.
Schedule checks before a long trip. A 30–60 minute appointment can prevent a week of frustration, especially when you’re switching from a rear-facing infant seat to a convertible seat.
Know when to switch from LATCH
Follow the child seat’s instructions for when to stop using LATCH and switch to seat belt installation. This works because the seat’s internal design and connector loads are limited by the manufacturer’s testing. In practice, you’ll often see a maximum child weight for LATCH use, and after that you use the seat belt for the lower connection while still using the tether if required.
Do not guess based on vehicle labels alone. The child seat manual governs the installation method, and the vehicle’s LATCH anchors are only part of the system.
Mini Case Examples
Daycare van: repeated loose installs
A small daycare used a minivan for multiple drop-offs and moved a convertible seat between two rear positions. The problem was consistent: the seat passed the initial install but loosened after the seatback was adjusted and after the seat was moved for cleaning. They switched to a single seating position, re-checked belt-path movement after each move, and added a tether-first routine during installs.
Result: the team reduced re-installs from about 3 per week to about 1 per month. They also stopped using a seat protector that interfered with base contact, which cut down on rocking. The seat itself didn’t change, but the installation workflow did.
Family sedan: anchor reach mismatch
A family installed an infant seat base in a compact sedan and found that the lower connectors reached, but the base sat at a slightly different angle than the recline indicator target. The problem wasn’t the tether; it was the cushion shape and how the base contacted the seat. They tried the adjacent seating position and confirmed tether routing, then tightened until the belt-path movement test stayed under 1 inch.
Result: they avoided switching to seat belt installation, which reduced install time by an estimated 5–10 minutes per trip. Over a year of daily use, that time savings mattered, but the bigger win was consistent tightness without repeated rework.
LATCH Buyers Checklist
| Check | What to look for | Why it matters | Pass/fail target |
|---|---|---|---|
| Anchor access | Lower anchors reachable without forcing | Avoids partial engagement and twists | Connectors click flat |
| Tether anchor | Tether routing matches seat manual | Controls forward rotation | Tether tightened, no slack |
| Belt-path tightness | Movement test at belt path | Seat geometry depends on tightness | Under 1 inch (2.5 cm) |
| Recline angle | Rear-facing indicator matches target | Affects airway and crash geometry | Indicator within range |
| Seat protector interference | No mat under base contact area | Prevents rocking and false tightness | No base wobble |
Common Mistakes and Fixes
Wrong anchor pair
Why it happens: anchors can be recessed or labeled unclearly, and some seats have connector reach that tempts you to “make it fit.” Impact: the seat can sit at the wrong angle, and the belt-path movement test can fail even if the connectors click. Avoid it by using the vehicle’s anchor markings and the child seat’s belt-path diagram, then re-check tightness after you tug at the belt path.
Skip the “close enough” mindset. It rarely survives a real movement test.
Twisting the LATCH strap
Why it happens: straps can twist while you route them around guides, especially when the seat is installed in a tight rear corner. Impact: a twisted strap changes tension and can reduce how the base locks down. Avoid it by routing the strap straight through the designated path and tightening while holding the belt path flat.
Re-check after tightening. Twists show up after you release pressure.
Using LATCH past the limit
Why it happens: caregivers assume vehicle anchors have no limits, and they miss the child seat’s LATCH weight threshold. Impact: the seat may not perform as designed once the child exceeds the tested range for LATCH use. Avoid it by reading the child seat label for the maximum LATCH weight and switching to seat belt installation when required.
Follow the seat manual, not the vehicle label. The seat design governs the method.
Forgetting the tether
Why it happens: some people treat the tether as optional because the lower anchors feel tight. Impact: without tether tension, the seat can rotate more in a crash, changing head and torso movement. Avoid it by attaching the tether whenever the child seat requires it, then tightening until slack is gone and the belt-path movement test stays under 1 inch.
Do the tether last, then re-check. That order catches slack that hides under the base.
Not re-checking after adjustments
Why it happens: rear seats recline, headrests move, and rear seatbacks fold, which changes how the child seat base contacts the cushion. Impact: a previously tight install can loosen after routine vehicle use. Avoid it by re-running the belt-path movement test after any seatback adjustment, after moving the seat, and after cleaning the seat area.
Schedule a quick check every time you change anything. It’s faster than redoing the install later.
FAQ
Do I have to use LATCH?
You do not have to use LATCH if your child seat instructions allow seat belt installation for your situation. Many seats permit either method, but the child seat manual controls the correct approach, including when to switch from LATCH to the seat belt based on child weight. If you use the seat belt, you still need a tight install at the belt path and correct tether use when required. If you are comparing vehicles, test both methods in the exact seating position you plan to use, because cushion shape and belt geometry affect tightness.
What does “under 1 inch” mean?
It refers to the maximum movement at the belt path when you test the child seat using the method in the child seat manual. The belt path is where the lower connectors or seat belt route through the child seat. You should measure movement by feel and then confirm with a ruler if you want a repeatable check. If the seat moves more than the allowed amount, the installation geometry changes and the seat may not protect as designed in a crash. Re-tighten, re-route, and re-test before you drive.
Why do some cars feel harder to install?
Anchor location and seat cushion shape vary widely. Some vehicles place lower anchors deeper in the seat crease, which makes it harder to connect without twisting. Others have a more upright rear seatback or a cushion that compresses differently, which changes the recline angle for rear-facing seats. Even when LATCH anchors exist, the tether anchor location can be awkward to reach behind a cover. The fix is practical: try the adjacent seating position, adjust headrest height, and confirm tether routing and belt-path tightness.
Can I use LATCH with a rear-facing seat?
Many rear-facing infant and convertible seats use LATCH for the lower connection, but the seat manual sets the limits and the required recline. The recline indicator matters because rear-facing geometry affects both comfort and how the seat supports the child’s head. In practice, you may need to adjust the vehicle seatback angle or use the seat’s built-in recline method so the indicator stays within the target range. After setting recline, re-tighten the LATCH strap and re-run the belt-path movement test.
What if my vehicle has no LATCH?
Some vehicles have fewer anchor positions, and some seating positions may not be equipped with LATCH. If your vehicle lacks LATCH in the position you want, you can often install the child seat using the seat belt, assuming the child seat manual permits it. You still need the tether when required and a tight belt-path install. If you are shopping, bring the child seat to the dealership and test the exact seating position you plan to use, because belt routing and buckle placement can change the final tightness.
Author's Insight
LATCH anchors matter because they change the installation workflow, and workflow affects tightness. A seat that passes the movement test in one vehicle can fail in another due to cushion angle and anchor reach. The most reliable approach is to treat LATCH as a method, not a guarantee: connect correctly, tighten to the manual’s method, then verify movement at the belt path. If you’re switching vehicles or seat types, re-check every time, even when the connectors click easily.
Key Takeaways
Use the vehicle’s marked lower anchors and the child seat’s belt-path diagram, then tighten while holding the belt path flat. Aim for under 1 inch (2.5 cm) movement at the belt path, and attach the tether when the seat requires it. LATCH can reduce setup guesswork, but it does not remove the need for a real tightness test, and it does not override the child seat’s LATCH weight limits.
Next step: test the exact seating position you plan to use with your child seat installed, then re-check after any seatback or headrest adjustment. If you cannot reach the tether anchor comfortably or the install keeps failing the movement test, schedule a certified inspection and consider switching to a different seating position or seat model. Seek professional medical advice if you have concerns about your child’s fit, breathing, or posture in a rear-facing seat.